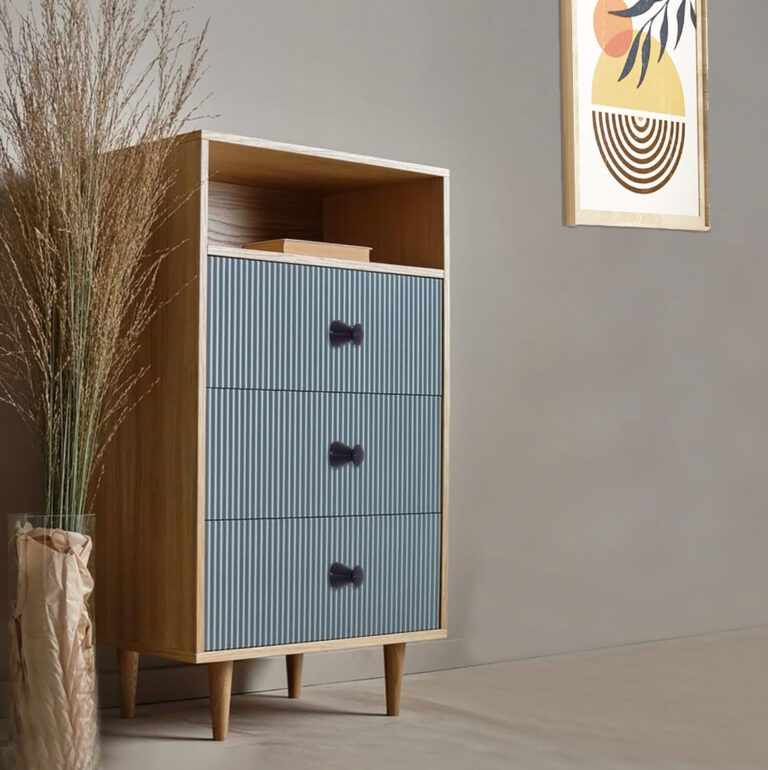
Upgrading your home interior doesn’t always require a big renovation. Sometimes, the smallest enhancements create the strongest visual impact, especially when it comes to installing handles and knobs. These compact hardware pieces influence the aesthetics, comfort, and functionality of your cabinets, wardrobes, and drawers. Whether you’re refreshing kitchen cabinets, adding new wardrobe handles, or replacing old drawer knobs, installing them the right way is essential.
Many homeowners attempt this task but end up with misaligned hardware, uneven drilling, or handles that loosen after a few weeks. This difference is exactly what separates a casual DIY job from a professional finish. With the right process, accurate measurements, and the correct tools, you can perform DIY handle installation and DIY knob installation exactly like an expert carpenter.
This blog simplifies every step, giving you professional secrets, hardware alignment rules, drilling techniques, and practical methods to install handles and knobs with precision while naturally integrating essential keywords like handles installation, knobs installation, cabinet handle installation, wardrobe handle installation, and more.
Even if you buy the most premium hardware, bad installation instantly spoils the look. Misalignment catches the eye immediately, sometimes even from across the room. When your cabinet handle installation or drawer knob installation follows the correct process, your furniture looks symmetrical, premium, and visually balanced.
Here’s what proper installation ensures:
Accurate center alignment
Comfortable grip and consistent height
Clean drilling without splintering
Smooth daily movement
Strong long-term durability
Handles and knobs are touched every day, and solid installation gives your furniture a long life. Poor installation, on the other hand, may cause cracked laminates, crooked handles, or wobbling knobs. That’s why professionals always measure carefully and drill slowly, letting precision guide the process.
Before discussing how to install handles or how to install knobs, you must know how to choose the correct hardware. Professionals always inspect the furniture style, size, finish, thickness, and usage before installing anything.
Shape & Style
Straight handles = modern and minimalist
Curved handles = elegant and ergonomic
Round knobs = classic and compact
Long handles = ideal for wardrobes and tall shutters
Profile handles = sleek, hidden, and contemporary
Choosing the wrong style may overpower the furniture or make opening uncomfortable.
Center-to-Center (Hole-to-Hole) Size
This is one of the most important decisions for furniture hardware installation. Common handle measurements include:
96mm
128mm
160mm
192mm
256mm
This measurement decides where drilling marks must be made.
Finish & Material
Hardware should complement your interior style. Popular finishes include:
Matte black
Chrome
Stainless steel
Brushed nickel
Brass
Rose gold
Antique bronze
Choose a finish that matches hinges, wall colors, lighting, and the furniture surface.
Furniture Type Compatibility
For kitchen cabinets → medium-length handles
For drawers → center knobs or compact handles
For wardrobes → long handles for better grip
A perfect match between hardware and furniture enhances both visuals and comfort.
Professionals never work without their essential toolkit. If you want your DIY handle installation to look flawless, gather the right equipment beforehand.
Professional Tool Checklist
Measuring tape
Carpenter’s pencil
Drill machine
Drill bits (2mm, 3mm, 5mm depending on screw type)
Handle installation jig
Masking tape
Spirit level
Screwdriver
Sandpaper
Safety goggles
These tools ensure precision. A small mistake in drilling can ruin your furniture, which is why each tool has a purpose—especially the installation jig, which guarantees consistent placement across all cabinets.
Knobs are simpler to install but still require accuracy. Center alignment is the main priority.
Mark the Exact Center
Use a measuring tape to identify the horizontal and vertical center of the drawer or cabinet shutter. Draw a tiny dot with a pencil.
Apply Masking Tape
Masking tape prevents the drill bit from slipping and protects the laminate from damage.
Drill a Starter Hole
Start with a small drill bit (2mm or 3mm). This avoids cracking and allows the final drill bit to enter smoothly.
Drill the Final Hole
Use the correct bit size to match the knob screw. Keep the drill straight and steady.
Fit and Tighten the Knob
Insert the screw from behind and tighten the knob gently. Do not overtighten—it may affect the knob’s alignment or damage its base.
Installing handles demands more precision than knobs because there are two drilling points.
Identify the Correct Placement
Professionals follow standard alignment rules:
Upper cabinet = handle at bottom corner
Lower cabinet = handle at upper corner
Wardrobe = vertical handle at comfortable hand height
Drawer = centered or symmetrical positioning
Mark the Drill Points
Measure the center-to-center distance (e.g., 128mm) and mark the two points exactly.
Use a Handle Jig
A template ensures all handles across the kitchen or wardrobe align at the same level.
Double-Check Alignment with a Spirit Level
This prevents tilted or uneven handles.
Drill Slowly and Carefully
Drilling too fast can chip the surface. Professionals always drill slowly, maintaining pressure and angle.
Install the Handle
Insert screws from the inside and tighten the handle evenly on both sides.
Many people assume installing hardware is easy, but small errors lead to big visual problems.
Misalignment
Eyeballing measurements is the biggest mistake. Always measure twice and drill once.
Incorrect Drill Bit Size
If the hole is too big, the screw will loosen over time. If too small, the screw won’t enter smoothly.
Skipping Masking Tape
This often causes scratches or chipping.
Overtightening
This can bend the handle or crack the laminate.
Wrong Handle Size
Handles that are too long or too short spoil the cabinet proportion.
Avoiding these mistakes instantly elevates your installation quality.
Every furniture piece requires a slightly different approach. Professionals always tailor their process based on the surface and usage.
Wardrobes
Use long handles for tall shutters
Ideal handle height: 900mm–1200mm from floor
Ensure same handle height on both shutters
Cabinets
Match handle placement with nearby shutters
Use medium-sized handles for convenience
Drawers
Small drawers → one centered knob
Large drawers → two knobs or two handles
Kitchen Cabinets
Maintain consistency: all upper cabinets must align
Ensure the handle does not clash with surrounding shutters
Well-planned spacing offers both beauty and uniformity.
Professionals rely on a few additional tips to achieve flawless results.
Use a Backing Block
Place a wooden block behind thin boards while drilling to prevent splintering.
Countersink Lightly
A small countersink helps screws sit perfectly.
Upgrade to Premium Screws
Some included screws are short or weak—replacing them improves durability.
Pre-Test Handle Movement
Before tightening, open and close the door to check natural movement.
Always Use a Jig
It guarantees uniform placement across all cabinets and drawers.
When upgrading cabinet hardware, choosing a trusted brand ensures both durability and aesthetic value. Flybird Interior delivers high-quality cabinet handles, wardrobe handles, knobs, profile handles, and drawer handles engineered for precision and built from premium-grade materials. Each piece is crafted to offer strong grip, refined finish, and long-lasting performance—making it ideal for both professionals and DIY homeowners.
Flybird Interior stands out because of its attention to detail, corrosion-resistant coatings, and modern design techniques. Whether you prefer a sleek, modern look or a luxurious, decorative style, Flybird offers a wide selection of finishes and sizes to match every interior theme. Every product undergoes strict quality checks to ensure flawless alignment and perfect functional smoothness.
Why Flybird Interior Hardware Is the Right Choice
Premium materials for long-term durability
Elegant, modern, and ergonomic designs
Moisture-proof and rust-resistant construction
Wide range of finishes for every interior style
Precision engineering for perfect alignment
To ensure your hardware retains its shine and strength:
Clean using a soft cloth and mild soap.
Avoid abrasive cleaners or harsh chemicals.
Tighten screws periodically to prevent wobbling.
Keep hardware dry to avoid corrosion.
For matte finishes, avoid oil-based polishes.
These simple habits help your handles and knobs maintain a premium look for years.
Installing handles & knobs like a professional doesn’t require special training, only precision, patience, and the right method. With the correct measurements, thoughtful hardware selection, careful drilling, and premium products, you can easily transform your cabinets, drawers, and wardrobes. These DIY handle installation and DIY knob installation techniques ensure your furniture looks polished, balanced, and modern.
When paired with high-quality Flybird Interior’s Products, your installation becomes even more impressive, offering long-term performance and a beautiful design. A little attention to detail can redefine your entire interior space, making your home more stylish, functional, and refined.
Visit our other blog: Creating Cohesion: Matching Hardware Across Different Rooms
Your email address will not be published. Required fields are marked*
Jay Siyaram Ind 2, Shed 1,
Nr. Ajay Weighbridge, NH 8B,
Rajkot, Gujarat 360003.
Canada 171 Marien Ave, Montreal-Est,QC H1B 5V1, Canada
House of Luxurious Furniture Fittings

Ready to Get Started?
Get our product brochure.
Copyright © 2025 Flybird All rights reserved
